These Updates!

Hi so a quick update! (this is cause I’ve missed a post and need to do it to fill college submissions).

Since the VHS style shader that i created using a tutorial for UE4 i have gone on to create a sobel edge shader which creates a cell shaded style of look similar to borderlands (probably because what they used was very similar) and i am now modifying this to work with the current project, essentially what will happen is that the VHS shader will kick in whenever the player takes damage and the sobel edge shader will be used for the majority of the time.

SobelShader

So that’s what i have now, currently it doesn’t render the textures that are present within the scene so i have to figure that out however i am confident that i will figure this out relatively soon.

Apologies for the short post however i need to catch up on them, Hope you enjoyed.

Shaders are go!

Hi everyone so for this week i took a break from my usual asset development to try my hand at the creation of some custom shader’s for use with our game, a shader is what is used to render the game world and essentially for this i will be creating a material system that piggy backs onto the UE4 camera shader and renders the effects I’ve created , To begin this process i talked with one of the Lecturers at my college and he gave me some good examples on were to start.

For this shader i attempted to recreate a VHS style Static screen, i was actually astounded when i was reading on the UE4 documentation site to discover a tutorial that very closely does what i am attempting to create, example below of current shader.
ShaderExampleThis was created using UE4’s node based material system and i am so far very happy with the results, their are still some problems with it that need addressing though which i have not figured out yet, For one the shader does not render particle effects and the current suggested workaround for this completely breaks the shader, Example below.

Broken ShaderAs you can see the shader is now rendering out completely incorrect to what i want (pretty cool looking though, kinda like the camera effect from outlast), however it now renders particle effects, I am not entirely sure how this works however from what i understand it is due to how the scene’s layers are rendered.

The idea behind this shader is that it will be present whenever the player takes damage, and it will increase in fluctuation when the player is close to death. For fun i want to try and add a sobel edge effect ontop of this shader to try and give the world a more cartoony feel to it and less serious, I am very happy with what i have got so far and would like to try and use this shader effect for use in other projects later.

Hope you have enjoyed reading.

This week in map stuff

Hi everyone!, over the past week i have spent most of my time doing minor changes to the map, most of these being changing the length of lanes and other such things to allow for the implementation of assets into the level, as well as this i have begun creation of textures and unwrapping models for texturing, with my textures they’re mostly just basic colors and shapes with some added noise to make them more visually interesting, then when i am happy with the base texture i create a normal map using an Nvidia plugin that can generate a normal map and then i edit this partially to get the desired effect.

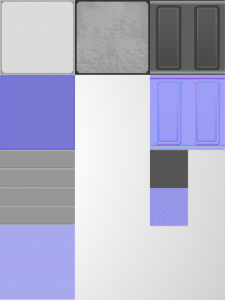
Below is an example of the textures i have so far created along with their normal maps and specular maps, the normals maps are used to give the effect of 3D and the specular maps are used for the engine to figure out how to properly light the texture, Their is also an option within Unreals material editor to let me create a specular just using the blueprinting system, for this project i have tried a combination of both to try and get some cool looking lighting out of the textures.

TextureSheetAfter i have create the textures,normals and sometimes speculars i then take it into UE4 and begin creation of the material, depending on what i want this can be either a very straightforward process of a bit of a tricky one, For instance the below gif is a material that i have created entirely within UE4, none of this has been animated within another program.

MaterialEffect

In order to create this effect i had to create several different nodes, within the emissive area which gives it a glow effect when rendered in game i also have a cloud texture that i quickly made in Photoshop using the cloud filter which i am overlaying on top of the colors and then panning to the left.

Within the pulse section of the material i have set it up to occasionally make the material glow slightly brighter than what it is default set to by the emissive, Above this is the specular map input which also contains two variable which are plugged into roughness and metallic which further help to make it feel like a real object in the scene.

Above that their is also the default material that is overlayed on top of everything else and then also the normal map which is used to give it the pretend effect of 3D lighting.

MatExampleSo other than all that stuff which i have greatly enjoyed doing i have also been slowly optimizing and unwrapping my 3d models that are already in the scene to be ready for when i texture them.

Hope you’ve enjoyed reading and tata!.

Hi everyone here is another update on how the map is going, currently I have created multiple assets to populate the scene with, the major parts being Huge pipes which i guess would be used to transport sewage,water or house electrical cables for connection between the higher and lower part of the city, Below is a gif of a brief fly over.

MapFlyOver

Mostly i have been working on trying to make sure the pipes phase in and out from top to bottom using either fog or at the top of the level a massive block, which is meant to represent part of the unfinished city, Originally i was going to use a volumetric fog to cut off both the top and bottom, however currently their is no such tool in UE4 to allow me to do this eventually i will try and create a fog particle effect to try and block out the upper sections.

I also had help from one of the lecturers who helped me improve some of my already completed assets and i plan on creating some basic textures for the level so that we have something more tangible to show off for a presentation that is coming up soon on the project.

As well as all this both myself and another class mate have begun designing what the HUD will look like, below you can see the most current design for the HUD, it has to show all three placeable towers, the players crossbow as well as a wave counter and a bolt counter for the player, We decided to position it at the top center of the screen instead of the bottom as having the HUD and the crossbow in the same section of screen space would be to confusing for some players.

HUD

Aside from all that i haven’t been doing much else, i look forward to mocking up some textures for the level and seeing how that goes as i always enjoy creating assets, anyway hope you’ve all enjoyed the read and ill see you next time.

Work stuff

Hi everyone, apologies that i am a week late in posting this blog so expect another blog post this week around Friday!.

For the past week i have been mocking up really basic high level concept HUD’S for our project as well as creating some minor details for grey box to give the level a sense of scale, On top of all of this i created a technical document for use with the project, it is incomplete however this document will likely continue changing depending on what happens with the project so this is not a problem realistically.

So with the HUD high level concepts I’ve been doing i just created a Photoshop file with a canvas size of 1920×1080 created some text elements called “Wave counter, Money counter and Selectable turrets” and with these i can easily place them around the scene and get a rough idea of what the HUD would feel like in game, obviously their is only so much i can do with this before taking it into UE4 but because of UE4’s UI widget tool this isn’t a problem, as i can easily create multiple types of HUD’s and try them in game.

As for the level, for the most part all I’ve had to do is re-size the level which only took a few minutes, then set about creating spaces for the player to be able to navigate between each lane, The way I’ve gone about this is creating narrower lanes which the player can use to quickly get between each lane however these also offer a certain level of risk as the player if they’re not careful could easily fall off and die which could lose them precious building/defense time.

LevelExample

The idea behind the scene is pretty similar to one of my earlier concepts which was the two larger towers among the city, a map which can be downloaded Here, however this is more similar to Deus Ex human revolutions Hengsha map which i really love.

Aside from all the stuff on this project i have been slowly creating some basic mock ups for the final project of my course, I wont show these now as i want more time with them before i show anything on it.

Hope you enjoyed the read!.